3.5 Mapping Exercise Four - Preliminary to Final and Archiving Features
There will be times when you want to save a version of a site plan, such as mapping both preliminary site plans and finals and archiving systems. The 'Snapshot' tool is used to create an exact copy of an existing feature(s). The resulting Snapshot features are accessible as 'Snapshot Layers' and managed in the Toggle Layers under the 'Fetch EH Snapshots' layer group.
'Snapshot' layers contain features that have been archived to preserve original mapping. 'Snapshot' layers can't be edited to modify a features (Septic Tank, Well, Drain Field, etc.) attributes or geometry, but the features on a 'Snapshot' layer can be deleted.
Features can be archived to a 'Snapshot' layer one at a time or by selecting multiple features, such as all of the features that make up a preliminary site plan.
IMPORTANT: The 'Create Snapshot' tool is only available in the 'Online' mode.
The exercise below works through two options for preserving mapped features using the 'Snapshot' tool.
Creating Snapshots
1.0 Start with a site that has been previously mapped, such as the site mapped in the first mapping exercise. In this example you will create a 'Snapshot' for a single feature.
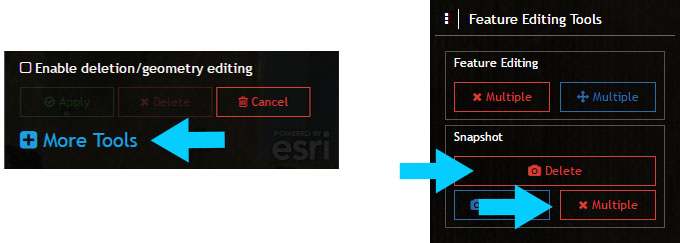
Select the Building on the map and then select 'More Tools' from the Edit Features Menu and then select the 'Snapshot' button from the 'Feature Editing Tools' menu.

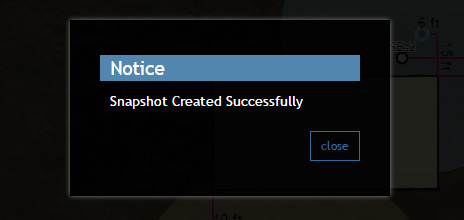
A notification will appear stating that the 'Snapshot Created Successfully', select 'Close'. You have now created your first 'Snapshot' of a feature, in this instance the Building.
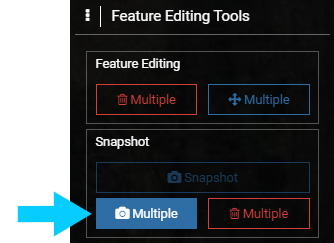
We will view the 'Snapshot' layers later, but first you will use the 'Multiple' option to create 'Snapshots' of multiple features.
2.0 Similar to deleting multiple features, creating 'Snapshots' for multiple features does not require that any particular feature be selected.
Select 'More Tools' and then select the 'Multiple' button located under the Snapshot title in the 'Feature Editing Tools' menu. This will open the 'Group Snapshot Creation' window, which offers options to filter the selected features
2.1 To select multiple features for creating a 'Snapshot', press and hold the left mouse button and drag a box around the features that will be used to create a 'Snapshot'.
In this example try to select all of the features mapped for the site plan.
2.2 Since you previously created a 'Snapshot' for the Building, uncheck the 'Create' checkbox for the Building. This will remove the Building from the selected features being used to create a 'Snapshot'.
2.3 Select 'Finish' to create the 'Snapshots'. You will be prompted - "Are sure you want to create XX number of snapshots?", select 'OK' to create the 'Snapshots'.
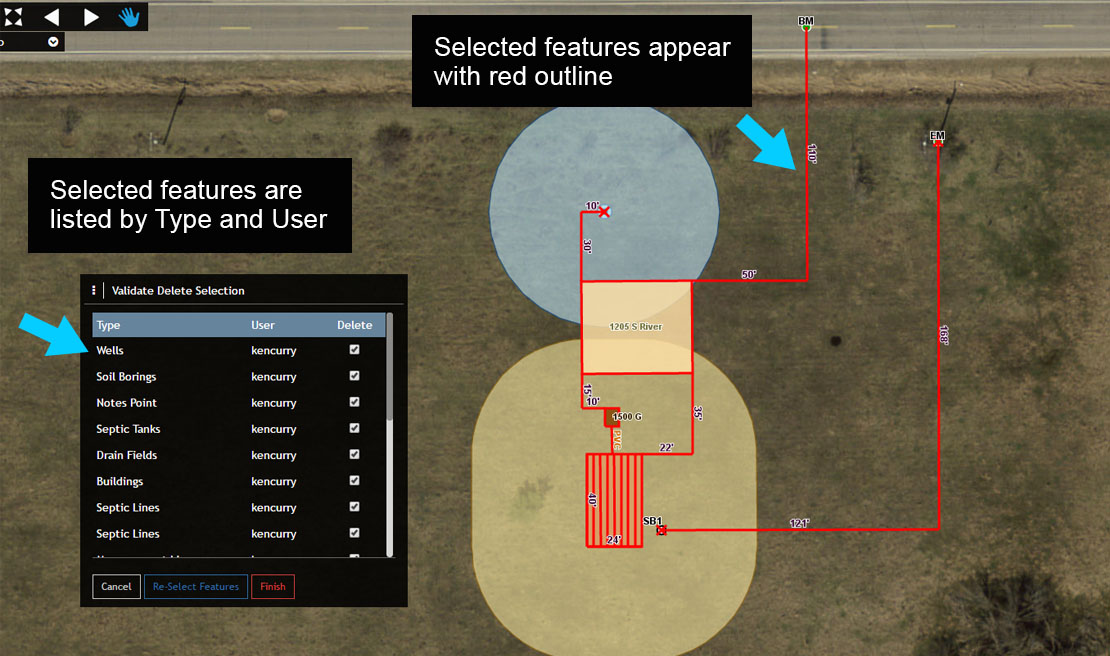
Selected Features
2.4 You should notice that the features on the map now look different because both the 'Snapshot' features and the original features are displayed.
2.5 Select the 'Toggle Layers' option on the Main Menu and locate the 'Fetch EH Layers' group.

2.6 Next, toggle off the visiblity box next to 'Fetch EH Layers' to turn the visibility off for these map layers.
2.7 You should now see only the 'Fetch EH Snapshot' layers on the map.
Select the Drain Field to open the Information Window. You can view information for any Snapshot feature by selecting it, but you can't add or modify information, or make any edits to the geometry, such as moving the feature.
2.8 Turn the visibility back on for the 'Fetch EH Layers' by toggling the visibility box next to the 'Fetch EH Layers'.
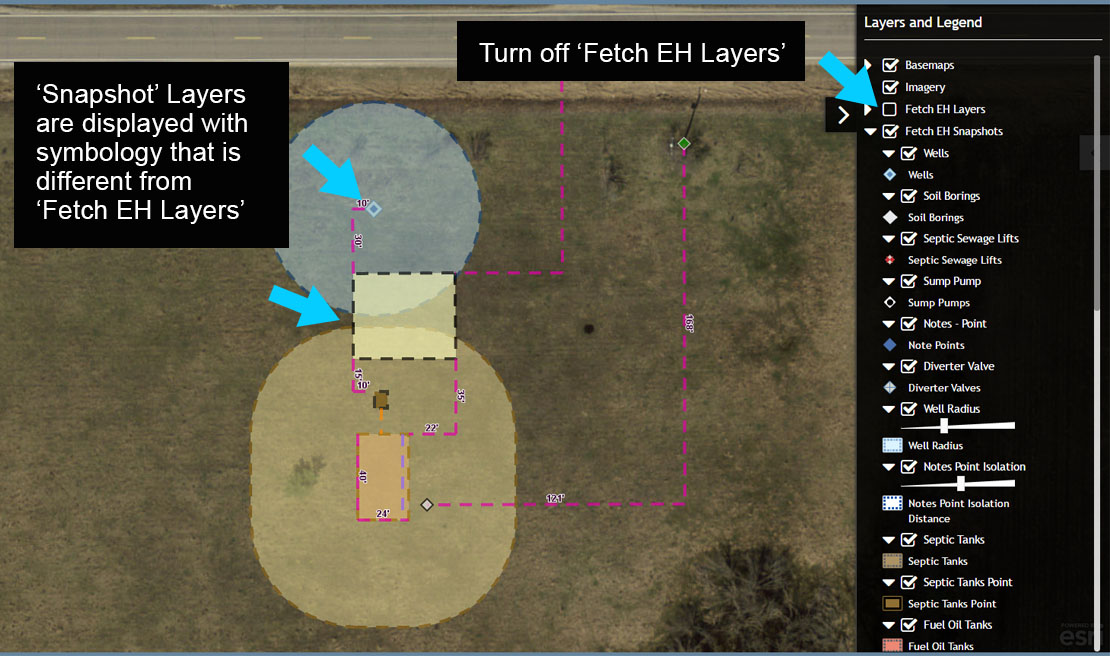
Snapshot Layer Symbology
Updating Mapped Features
3.0 Next, you will move the original Well and modify information for the original Septic Tank
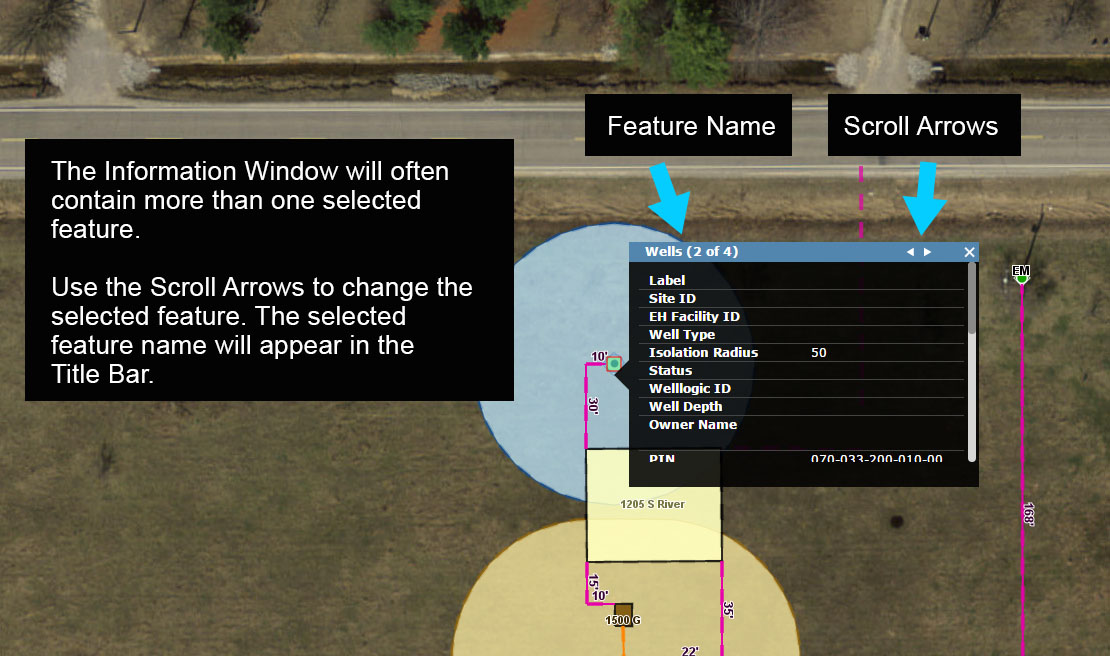
Start by selecting the Well. Notice that because there are multiple features in the selection area (Wells, Snapshot Wells, Measurement Lines and Snapshot Measurement Lines), multiple features are available in the Information Window.
3.1 In the Title Bar of the Information Window the Name of the currently selected feature is displayed, along with the sequence (2 of 4) and Paging Arrows.
The (2 of 4) indicates the Information Window is displaying feature 2 out of a total of 4 selected features.
If the Wells are not currently selected, use the Paging Arrows to make the Wells feature the currently selected feature.
3.2 Once Wells are the selected feature in the Information Window, toggle on 'Enable deletion/geometry editing'.
Selecting Features
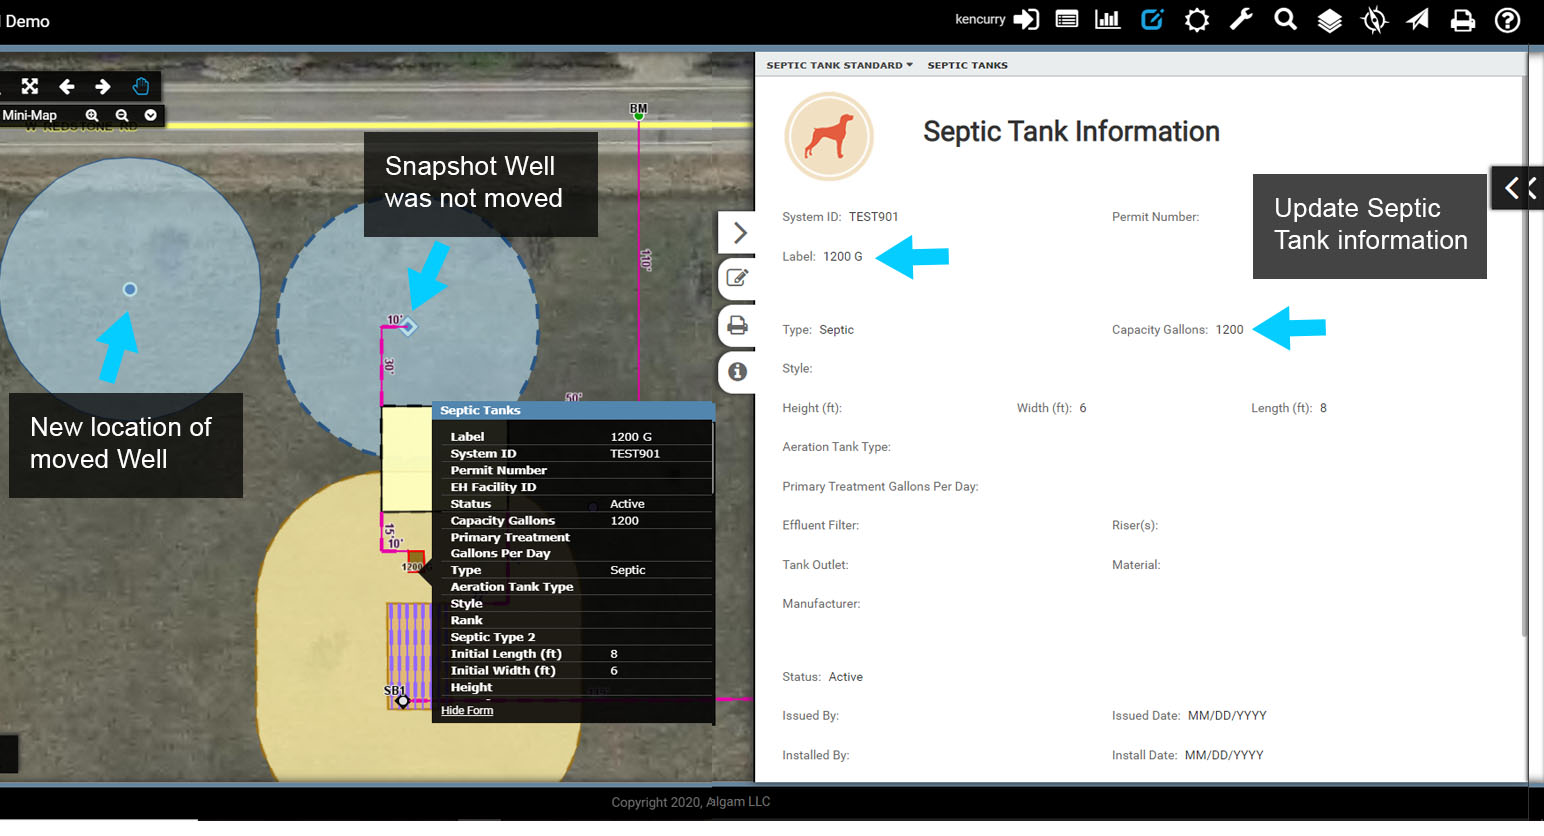
3.3 Move the selected Well to a new location northeast of the Building.
Select 'Apply' in the Edit Features menu to save the edit. You should now clearly see the archived or Snapshot Well, which is unchanged, and the Well, which is in its new location.
3.4 Next, update some information for the Septic Tank. Select the Septic Tank and again scroll through the selected features in the Information Window until the Septic Tank is the currently selected feature.
3.5 Select 'Show Form' to open the Septic Tank Form and enable editing.
Update the following information for the Septic Tank:
Label: 1200 G
Status: Permitted
Capacity Gallons: 1200
Select 'Apply' to save the updates.
3.6 Scroll between the Septic Tanks and the Snapshot Septic Tanks and notice that you have updated the information for the Septic Tanks, but the Snapshot Septic Tank has retained the original information.
Editing Features/Retaining Snapshot Feature
3.7 Lastly, delete the Snapshot Septic Tanks feature by selecting it, and then select 'More Tools'.
Select 'Delete' located under the Snapshot text in the 'Feature Editing Tools menu. This will permanently remove the Snapshot Septic Tank.
To delete multiple Snapshots at one time use the same process above, but select the 'Multiple' button in the 'Feature Editing Tools' menu.